What is a digital badge?
Your digital badge serves as a quick and reliable way to share and verify your credentials. This digital badge will display all credentials that you have earned, including specialty credentials. This badge can easily be added to your email signature, resume, or social media profiles.
How long is my digital badge valid?
Digital badges are available as soon as a credentialed practitioner submits their annual payment and valid thru December 31 of that year. Digital badges will then need to be reactivated on a yearly basis which is done by submitting annual payment or support payment.
Why is my digital badge not displaying when using the personalized URL?
Your digital badge may not be active for a variety of reasons. Some of the most common reasons are listed below.
- Practitioner payment is not current – Your digital badge is benefit of paying your annual payment or your support payment.
- Practitioner credential(s) expired – You must have valid, unexpired credentials for your personalized digital badge page to display.
- Invalid badge link – Each digital badge has its own unique URL. Ensure that you have copied or typed the link carefully and accurately.
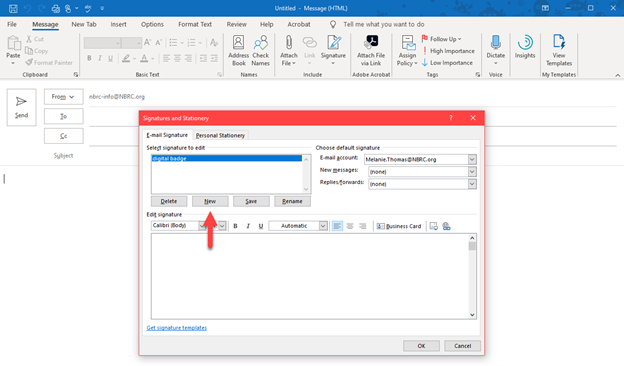
How can I share my digital badge in an email signature within Outlook?
Adding a hyperlinked badge image to your email signature is a great way to make sure your professional network is aware of your credentials. Use the instructions below to add your digital badge to an Outlook signature.
First, find your badge image and personal badge URL.
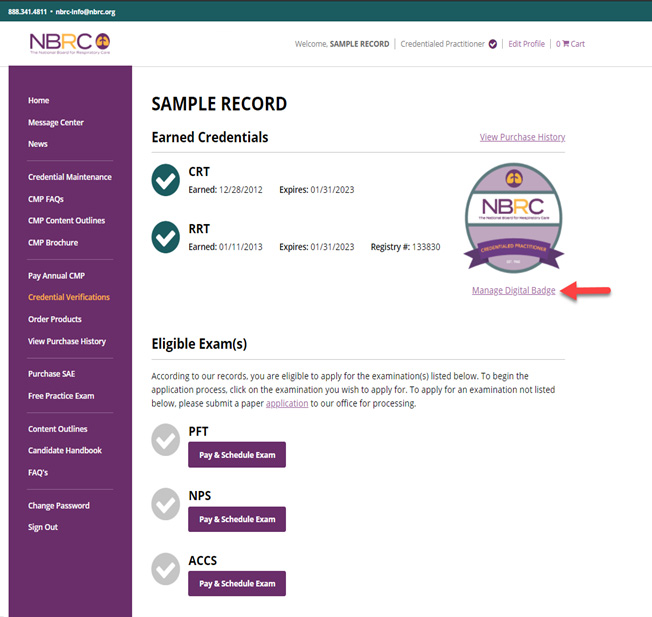
- Log into your Practitioner Portal account at nbrc.org and click on ‘Manage Digital Badge’
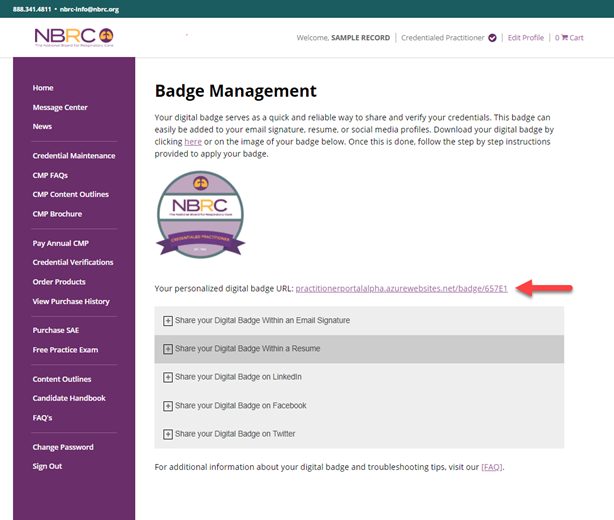
- Download your digital badge by clicking on the image or use the link provided on screen.
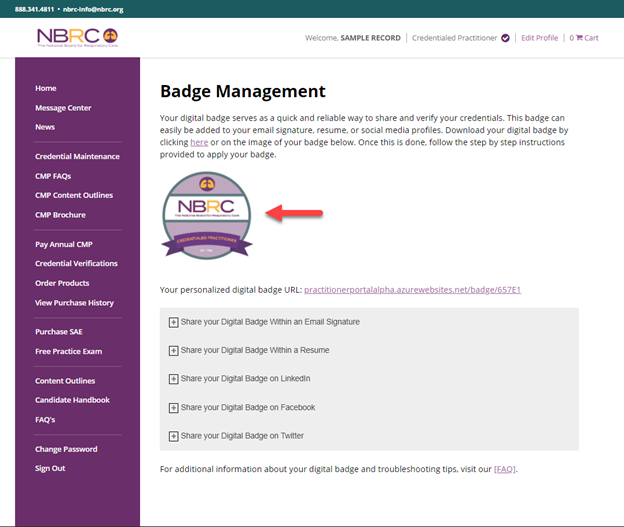
- Copy the URL for you personalized digital badge. You’ll need this to hyperlink to associate with the downloaded image.
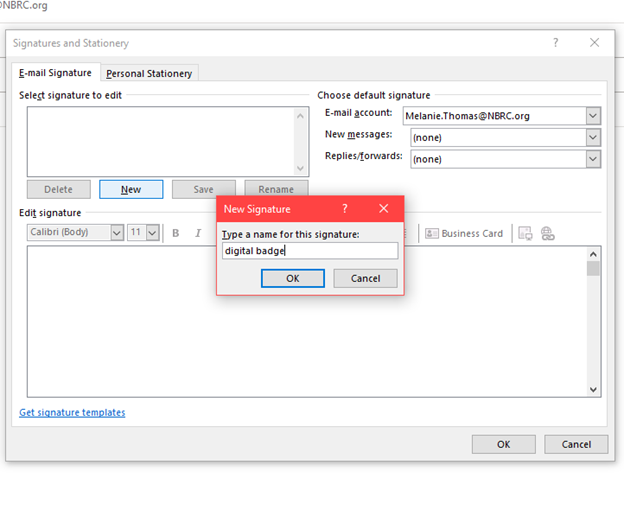
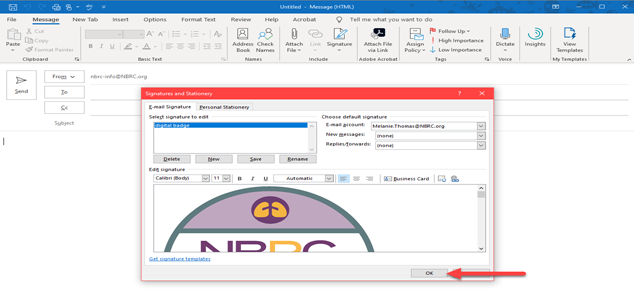
- Start a new email and click signature.
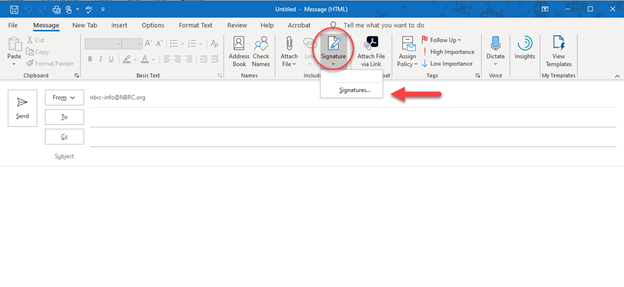
- Either add a new one (used for these instructions) or edit an existing signature.
- Select the image icon and choose the image you downloaded from your Practitioner Portal account. You can adjust the image size by dragging the corners inward.
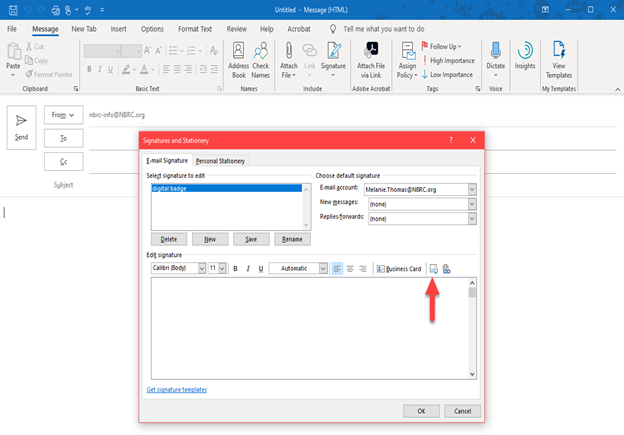
- Next hyperlink the image by pasting your personalized digital badge URL you copied from the Practitioner Portal.
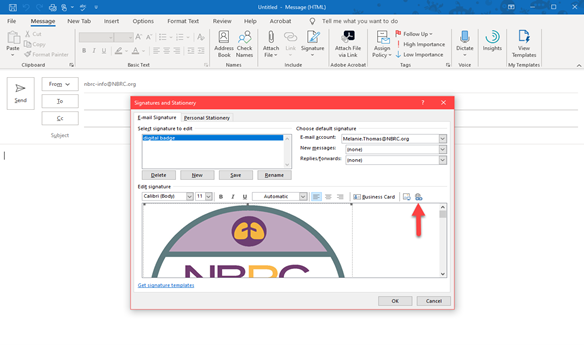
- Select Ok to save the new or edited Outlook signature.
How can I share my digital badge on LinkedIn?
To add a certification/badge to your LinkedIn profile, follow these step by step instructions:
- Download and save your Digital Badge image.
- Log into LinkedIn and click the Me icon at the top of your LinkedIn homepage.
- Click View Profile.
- If you have previously added a certification, scroll down to the Licenses and Certifications section, click Add and select Certifications.
*Note that if you have never added a certification, you will first need to add a Licenses and Certifications section. On your profile page click Add profile section button, click the arrow icon next to Background and then click Licenses and Certifications. - Type in your certification information as shown in the figure below.
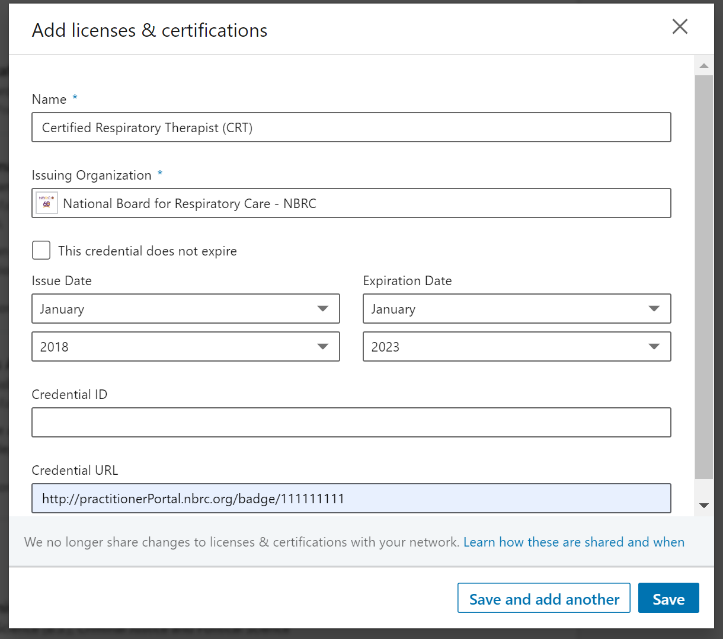
- Provide your Certification Name in the Name field. Add “National Board for Respiratory Care – NBRC” in the Issuing Organization field. Be sure to select the correct organization from the menu so the NBRC logo appears next to the certification on your profile. Note: The logo of the organization will appear on your profile, not the badge image. The Credential ID field should be left blank. Add your personalized URL link in the Credential URL field. Be sure to select the correct authority from the menu so their logo appears next to the certification on your profile. Note: The logo of the organization will appear on your profile, not the badge image.
- Click Save.
How can I share my digital badge within a resume?
To add a certification/badge to your resume or any other Word file, follow these step by step instructions:
- Download and save your Digital Badge image.
- Within the Word document, click the Insert tab, then Pictures, This Device and select the Digital Badge image you saved.
- Right click on the image within the document and select Link then add your personalized URL.
How can I share my digital badge on Facebook?
You can share your Digital Badge on your Facebook page from the Timeline tab in 2 ways—either as a Life Event or as a Photo.
Post as a Life Event
- Download and save your Digital Badge image.
- Login to your Facebook account and from Timeline, click on Life Event.
- From Life Event, click on Work & Education and choose Create Your Own tab at the bottom of the menu.
- Add a title on Create Your Own page which indicates you earned a new credential.
- On the right side of the page, click on Upload Photos and choose the badge image that you saved in step 1.
- On the Story tab, add your personalized URL with the instructions to follow the link to view your credentials.
- Select the people you would like to share your accomplishment with and click save.
- Once saved, it will appear on your homepage.
Post as a Photo
- Download and save your Digital Badge image.
- Login to your Facebook account and from Timeline, click on Photo and then Upload Photo.
- Once you click on Upload Photo, select the Digital Badge image that you saved.
- When prompted to “write something about this photo,” add your personalized URL with the instructions to follow the link to view your credentials.
- Click Post and it will appear on your homepage.
How can I share my digital badge on Twitter?
Follow these step by step instructions to share your digital badge on Twitter:
- Download and save your Digital Badge image.
- Log in to your Twitter account and click Compose New Tweet on the right-hand side of the menu.
- Create a message that tells your followers about your new digital badge and credential(s) and inform your followers that they should “Follow this link to view my credential:…” and add your personalized URL link.
- Click Add Photo and upload the Digital Badge image that you downloaded in step 1.
- Click the Tweet button and publish your credential to your followers.
